Sunday, May 5, 2013
Jelly, Jam, Preserves or Something Else?
Friday, May 20, 2011
Useful Strawberry Facts
I found these facts at What's Cooking America.
Fresh Strawberries:
1 basket = 1 pint strawberries = 7 cups whole berries = 2 1/4 cups sliced (1/4-inch thick) strawberries = 1 2/3 cups pureed strawberries. Basket of strawberries refers to the market package. 1 tray or flat of strawberries = 12 baskets or pints.
1 quart whole strawberries = 1 1/4 to 1 1/2 pounds strawberries = 7 cups whole strawberries = 4 cups sliced (1/4-inch thick) strawberries = 4 to 5 servings.
1 1/2 quarts fresh strawberries are needed for one 9-inch pie.
1 pint = 1/4 pound whole strawberries = 12 large strawberries = 24 medium strawberries = 36 small strawberries = 2 to 2 1/2 cups sliced (1/4-inch thick slices) strawberries = 1 1 /4 cups pureed strawberries.
1 cup whole strawberries = 4 ounces strawberries = 1/2 cup strawberry puree.
12 pounds or 8 quarts of fresh strawberries = approximately 13 pints of frozen berries.
Frozen Strawberries:20-ounce bag frozen whole strawberries = 4 cups whole strawberries = 2 1/2 cup sliced strawberries = 2 1/4 cups pureed strawberries.
10-ounce package frozen sliced sweetened strawberries =
1 1/4 cups strawberries in syrup.
Friday, September 17, 2010
Making Tomato Sauce from Tomato Paste
2 tablespoons olive oil
2 cloves garlic, chopped
1 (6 ounce) can tomato paste
4 teaspoons white sugar
1/4 teaspoon dried oregano
1/4 teaspoon dried basil
2/3 cup water
3 tablespoons grated Parmesan cheese
salt and pepper to taste
In large skillet, saute garlic in oil until golden. Add tomato paste, sugar, oregano, basil, water, cheese and wine. Season with salt and pepper and simmer 10 minutes over medium-low heat.
Friday, July 23, 2010
Dry Beans Conversion Chart
One 15-ounce can of beans = one and one-half cups cooked beans, drained
One pound dry beans = six cups cooked beans, drained.
One pound dry beans = two cups dry beans.
One cup dry beans = three cups cooked beans, drained.
Sunday, February 28, 2010
How to Prepare Chicken Feet
This year, we used a different approach to the butchering and just skinned and pieced the birds. It was quicker since we didn't have to scald or pluck the birds, or mess with gutting them. However, since they weren't scalded, we had to prepare the feet at home. I took pictures, so you could learn how to prepare feet for using in broth. They really are the secret ingredient for a truly mineral-rich broth!
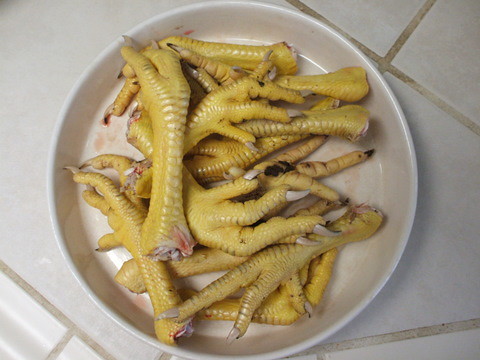
Here's my plate of feet before processing:

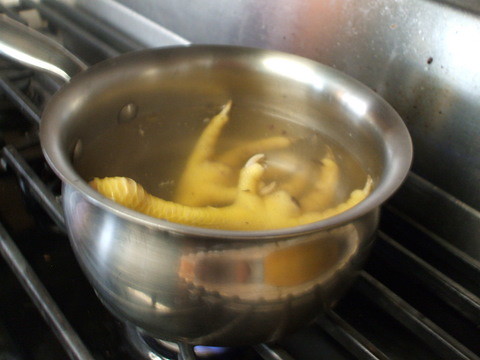
First you need to scald the feet in boiling water. Boiling water loosens the outer layer of scaly skin.

Next, remove the feet and let them cool just a bit. I only scalded two at a time, since they need to be hot for the next step.
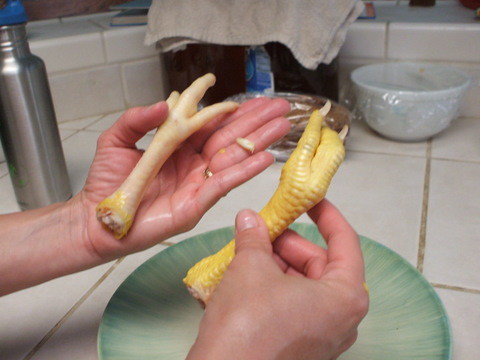
Rub the foot and leg briskly with your thumb and forefinger. The thick yellow layer should peel off very easily. Also, remove the sheaths that cover the claws. You didn't know the Lord made removable covers for chicken toes, did you? Everything that touched the ground while the chicken walked comes off and you are left with a sparkling clean foot. The white thing on my ring finger is a toenail sheath.

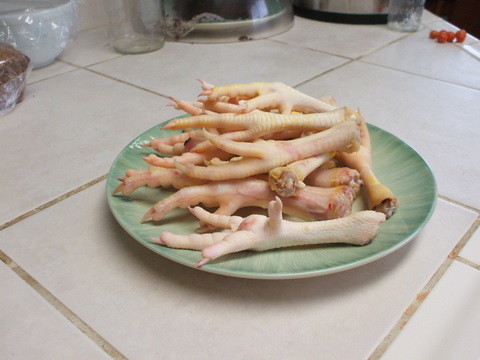
Repeat till you have a plate of clean, ready-to-use feet. Some people clip off the toes with a sharp knife to allow more gelatin to escape. This is optional. I get a great, solid broth without that step.

Friday, February 5, 2010
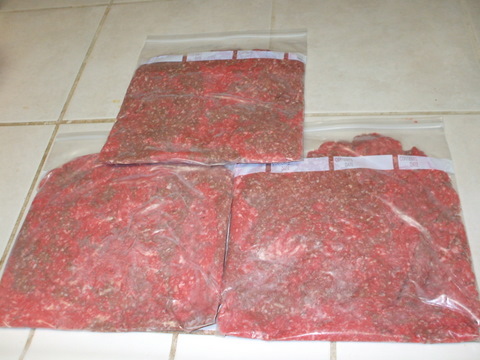
Freezing Hamburger

When I buy meat, I buy it in bulk packages, usually between six and seven pounds each. I weigh it on my handy kitchen scale (you do have a handy kitchen scale, don't you?) and divide it into 1 1/2 pounds portions. I usually cook one portion up right then, and freeze the remaining ones.
I put them into gallon sized freezer bags and press them flat, making sure the corners are filled. Easy as pie! I lay them in the freezer flat. When I need to thaw one, I place them in the sink and run a bit of hot water. They are thawed in just ten minutes or so!
Wednesday, January 13, 2010
Menu Planning Ideas
Now I have a great tool for those times I need to make a meal plan with just what's on hand. It also greatly assists my tired brain when I haven't planned (bad, Momma, bad!) and it's nearing meal time. "I do have a package of chicken thighs. What can I make with it?"
We rarely end up ordering pizza due to lack of a planned meal anymore.
How To Brew Kombucha Without A SCOBY
Many people are interested in brewing kombucha, but have a hard time finding a source for a scoby (mother, mushroom...they are the same thing). Here's how to do it without spending a fortune!
Buy a 12 oz bottle of prepared Kombucha tea from a health food store.
Prepare the sweet black tea as follows: Boil just less than a gallon of water, pour into a gallon size jar, add 2 cups white sugar (do not use anything like honey, or succanat, etc), add four Lipton black tea bags.
Steep tea fifteen minutes. Remove tea bags and discard.
Let tea cool to room temperature.
Pour in the entire bottle of kombucha.
Cover with a clean, thin cloth and secure with a rubber band. Let culture undisturbed about 2 weeks. Then you should have a mother on top and the tea should be ready to strain and enjoy!
Keep back 2 cups of the tea to add to your next gallon of sweet tea, along with the mother, of course. The next brew only needs to be 7-10 days long.
You will grow a new mother with each batch.
These are directions for basic kombucha. Once you learn how to do the basic, you can get creative! Lots of folks use flavored tea to switch things up or add fruits to the finished product to flavor it.
*ETA: Most store-bought kombucha is now pasteurized. Pasteurized kombucha will NOT grow a culture, or give you the benefits of raw kombucha. It is inferior by far.
Saturday, November 7, 2009
Basic Electrolyte Drink
4 oz water (half cup)
1 tsp honey
1 tsp lemon juice or raw apple cider vinegar
pinch of Celtic salt
Combine and use when ill or dehydrated.
Sunday, October 4, 2009
Another use for Flax
Three tablespoons of ground flax (without the water) also replaces 1 Tbsp of oil.
Please do grind your flax fresh, as it rapidly goes rancid. Just throw it in your blender for a few seconds and whir!
Smelly Hands?
If you have a stainless steel spoon, you can rub your hands all over it, under running water, and that will remove the smell.
You can also wet your hands with water, then get a palmful of baking soda or salt. Add enough water to make a paste, and rub your hands together like your washing them. The baking soda or salt will absorb the odor and exfoliate a bit, too!
I have heard that rinsing your hands with lemon juice after cutting garlic will remove the odor, but I haven't tried that one.
How to Store Garlic
Never store the garlic in the fridge, as it causes quick sprouting and a bitter taste.
To store garlic longterm, divide the heads into cloves, leave the paper on, and freeze in a sealed baggie. Take out as needed! What could be easier than that? I bought a BIG bag of garlic at Costco this weekend and will be prepping it for the freezer today!
Frozen garlic is easily peeled, crushed and minced for cooking. Thawed garlic will not substitute for fresh, as is has a different texture after being frozen.
Friday, July 10, 2009
A Sinkful of Help!

Bacon-the easy way